Monday 5 June 2017

Start from initial curve.

lol face....


                                                                   checking the surface
                                                               Line up the curve edge
                                                                          Progress....
                          So hard to get the round surface, those bump up are not easy to erase.
                                                      Finally get the round surface done.
                            Checking if it fits on the car and remark the line to get the right edge.
                                                                      Fit quite well.
                                                        Start polishing it.....again......lol.
                                                                      Different view.
                                                                          Finish sand.
                                                        Checking the curve again with car.

                                                                   Finish polishing

                                         First assembly(Not final looking!not final looking!)

                                        Shall update the final one after other guys finish, lol!
New update, Finally get our car done ohhhhhh~


Tuesday 23 May 2017

Final project is making the car shell of Farrari 250GT, it is pretty cool project I'd adimit, but also challengable. Took us almost three weeks to cut all the piece and finish the assembly, everyone did hard work on it. 

Making the template to get the precise curve and shape.

Measuring the size and probable shape of whole car, we divided into 6 parts which one for each, feel free to choose the "one" lol.

Cutting out paper template for cutting the big aluminium sheet.

Wednesday 10 May 2017

Fourth project is about hammering shape from hollow MDF shape, I guess what interest is people are focusing on large, radius shape so they could make it easier though, I didn't find out that until I got my shape lol. But I kind like this water drop shape.
So I made those tools for hammering different area, took my some time to get it done cause sanding nice radius is hard. This big one is for hammering the middle part of water drop, so I don't have to using small pieces to get a average radius through. The long thin one is for put out edges if water drop, because it not possible to get  a clearly refined edge through big block.

And begining with the middle part which is quite easy though, but it gets hard when I start the thin part on the head.

Those two cone shape is made for top part, tooke a few try to find out what the est digree to fit in that width and depth, but since it small area, so it didn't too me too long to get it done.
Hammering lol.

Finished, I didn't too image when I take it out of shell becasue I put it in again, maybe I'll cut it out when I finished car project.


Some new photos for showing the result.


Third project it quite tricky I guess, because this time we have to do something exactatelly the same, but is also a good co-oporation experience. So we started at two template.

lol, this face.

We want to make sure the size would be perfect fit, though we chose to do a large piece at begining, but then we know we wrong.

Hammering

The corner is the most tricky part, have to hammer it and cut it and hammer again to keep it in radius edge without stack on each other.

finish all the straight edges.

The wood template we used to refine the radius is totally broken some how, and we cant get the same template again which mains the edges is not compatible at all.

Then we end up doing a small one which is much easier after all, just get a same shape template, and hammer on it, I made four template this time for us, them we could tight to pieces together to make sure the corner part would not fall off or getting drag by unsupported side, and this time become much quick as well.

Hammering

Finish lol~

complete fit on surface, but only issue right now is I haven't see my teammates for few weeks, so we can't compare our final stuff to see how perfect it would be fit in which is sad, but I believe we will do this asap.

Monday 20 March 2017

Second project is reverse curve, can't compare with bowl which one is harder, but I guess reverse curve is much easier than bowl, at lease you don't have to make a perfect arc. 

I'm hammering.....

H-a-m-m-e-r lol~

Turns out it is looks really shit at the beginning.

Not even bumped up in the middle, needs more work. 

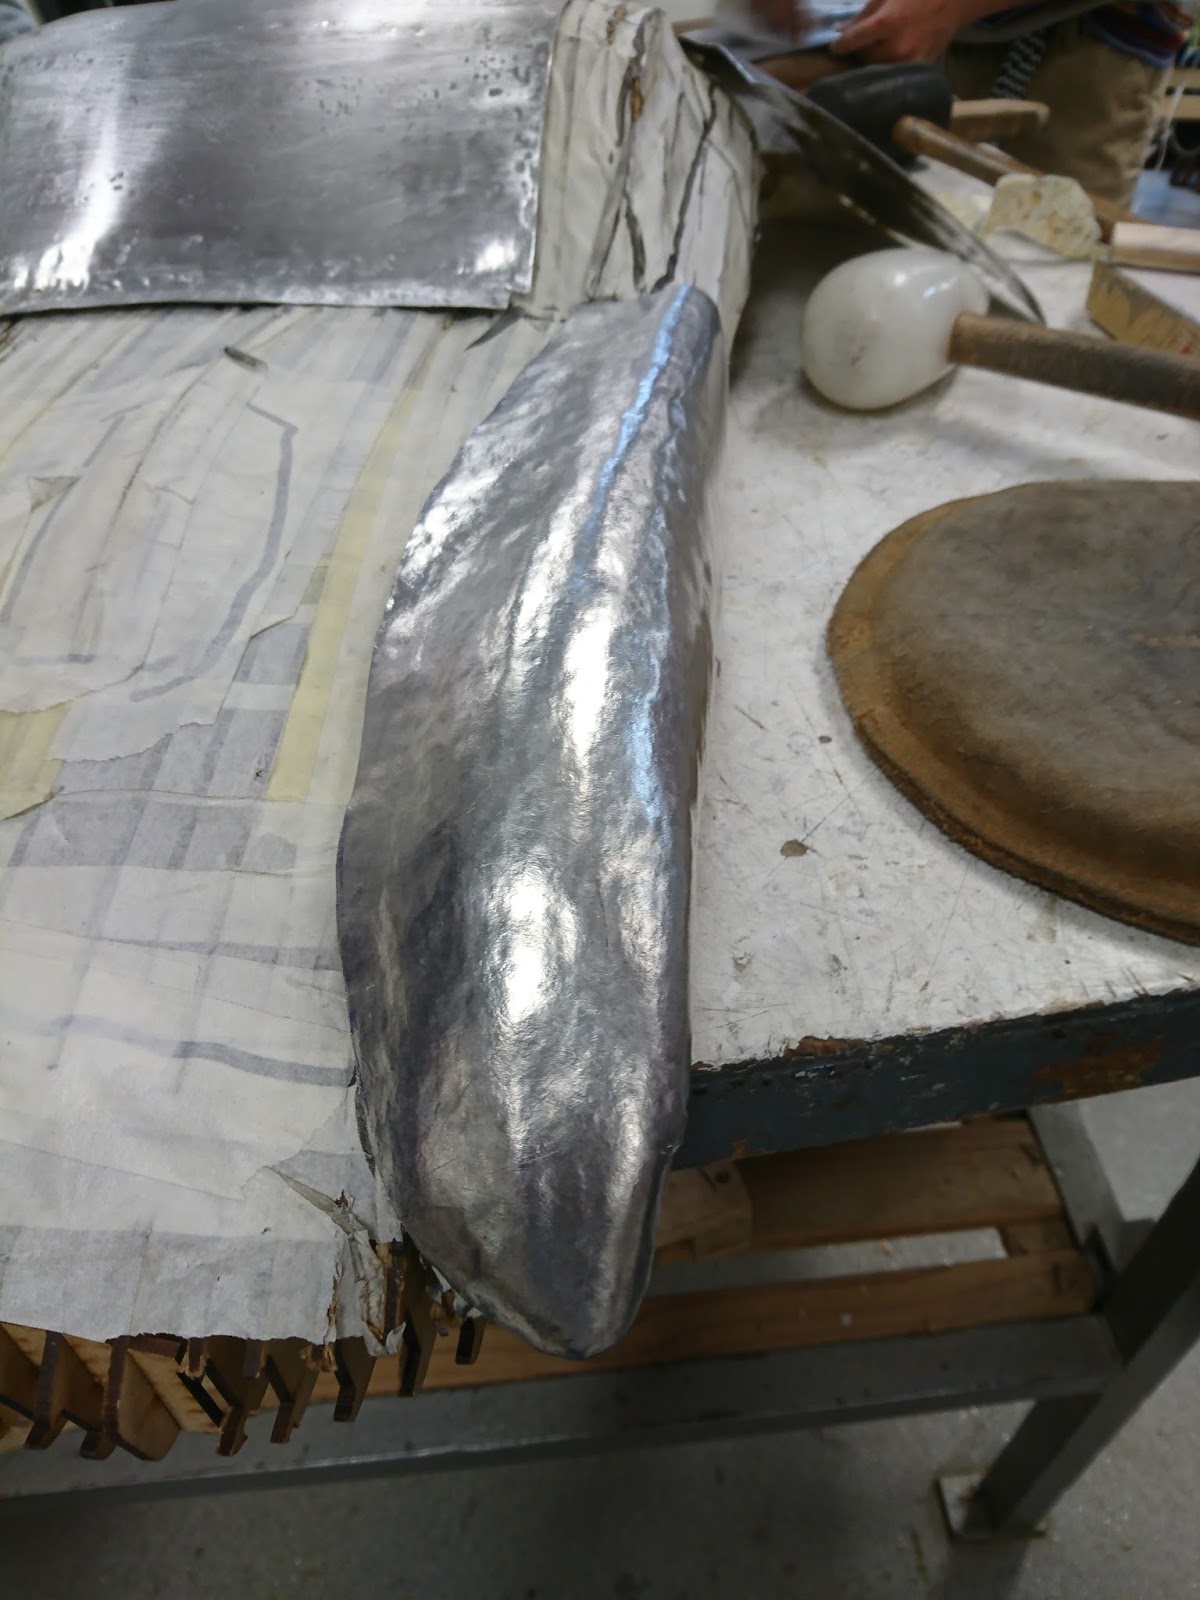
I skipped the middle process again, haha, this stage is nearly finish it.

Try to make the curve and edges more soft than before.

Hammering the end part for a straight surface to showing the slowly movement from curve to flat.

End stage, I'll start polish stage again lol, looking forward to it.

Is this even include in process journal? Hope not haha.
Again, I spent a lot of time to polish it with sand paper, 400, 600, 800, 1000, and end up with 1200, but I think I hammered it too much with small hammer, there are lots of spot on that I can't soft it out, but still looks cool though.

Sanding process

Final product lol